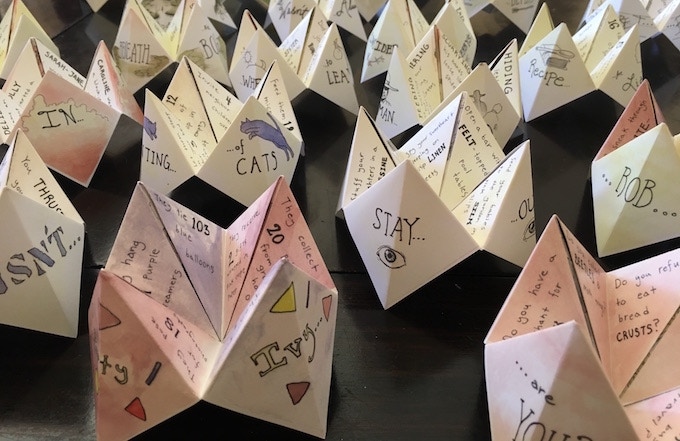
How to make a cootie catcher. Consider yourself back in grade school, sitting at your desk or possibly on the playground with your classmates. Your acquaintance digs into their luggage and takes out what appears to be a precious relic made earlier that morning. The paper is still bright white, with precise, angular folds that allow the item to open and close effortlessly and in a variety of ways. There’s a little mistake about it: this is a remarkable artefact, and your buddy had clearly taken great effort to carve every potential outcome onto its inside flaps. Which number should you predict? Which colour should you choose? What lies ahead for you in the future? Only the all-knowing cootie catcher knows, at least until later this afternoon, when it begins to rip and you have to build a new one.
The cootie catcher, which is still popular today, has been documented as a children’s fun paper pastime since the 1920s. It was initially used as a toy fortune teller in the 1950s and has since been appreciated by many. The cootie catcher was originally featured as a salt cellar in the 1928 book “Fun with Paper Folding.” This fun origami activity was first advertised as a DIY salt container, not as a do-it-yourself way to tell your future.
Since its days in the salt cellar, the cootie catcher has gone by a variety of names, including chatterbox and whirlybird. Whatever you call it, this paper toy has been enthralling and entertaining children and adolescents for decades, exposing valuable secrets and fortunes that only a child’s mind could think up. In today’s article, we’ll show you how to construct your own cootie catcher and play with this century-old paper toy whenever you like. See What Is Pokemon Showdown? Complete Guide For Beginner.
How to Make a Cootie Catcher in 12 Easy Steps
1. Choose your paper
In reality, any paper will suffice as long as it is not too thin. As a youngster, you can be confined to what you can find in your folders and notebooks, but as an adult and now mom, I prefer card stock.
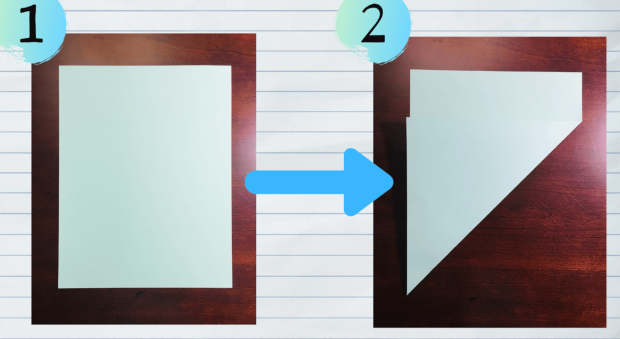
2. Bring your paper’s bottom right corner up to the left side.
Make sure to align the sides of your paper so that there is no weird overlap. You are converting an 8-inch by 11-inch piece of paper into a square. This technique works for almost any size of paper, and you can modify the width and height of your paper to suit how big or little you want your cootie catcher to be. A square sheet of paper, regardless of size, is an important basis for this origami project.
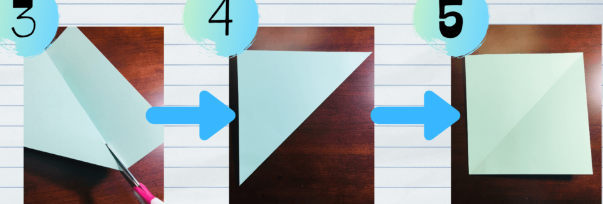
3. Trim the extra paper.
Remove everything that extends beyond the fold of your paper. This is vital since you’ll want to have your square ready to go. Unfortunately, you can’t build a cootie catcher like this one with any other size of paper than a square, so make sure this additional section is gone!
4. When you’re through with the chopping, you should have something like this.
Make sure all of your edges are the same length since you’ll have your finished square after you unfold the paper.
5. Unfold your square cootie catcher to reveal it!
You’ve completed the task! You’ve cut the square piece of paper that will serve as the foundation for your catch. Now comes the exciting stage, when you may start designing the catch itself.
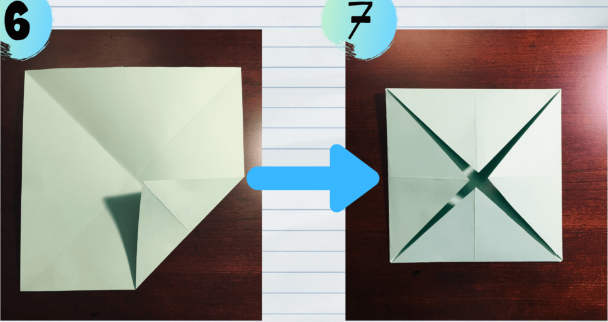
5b. Fold your paper in the opposite direction from the bottom left corner to the top right corner.
This is an optional extra step, but it is something I learnt to do after many, many tries at making cootie catchers as a youngster. I enjoy doing this section since it results in a perfect “X” on my paper. These fold-lines have proven to be excellent guidance for the remainder of the craft.
6. Fold your bottom left corner to the middle of the “X.”
This is where the adventure begins. Begin by bending each of your square’s four corners so that the points of the corners meet in the centre of the “X” on the paper.
7. Keep folding the corners until all four are finished.
At this point, your paper should look like this. It almost looks like an envelope, but it isn’t!
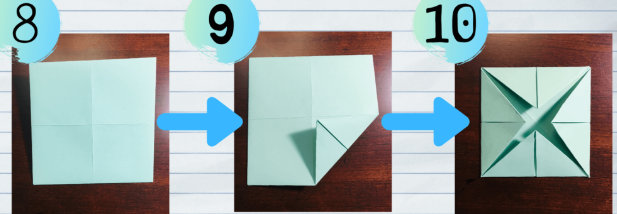
8. Turn your folded paper over.
You should now turn the paper over. Fold the corners in and flip the paper over so that the opposite side is now facing up.
9. Continue folding the corners.
Steps 6 and 7 are repeated, but this time you fold your already folded paper!
10. Don’t forget to fold all four corners!
The crease marks left in the paper from the previous processes will serve as useful recommendations once more. Fold in your corners so that the points of each corner meet in the centre of the paper. Repeat this step until all four are finished.
Wait! Before we continue on to the next phase, now is a good time to take a break and fold your cootie catcher. Let’s make sure we label everything that has to be labelled, shall we? What good is a fortune teller if there are no fortunes to tell?
- Flip your square so that the flaps are facing up. Write the name of a colour on each square. To make the outside of your cootie catcher “pop,” add patterns or use bright markers.
- Turn your square over to see the interior tabs. This side will appear to be made up of eight triangles. Write a number on each of these triangles.
- Flip your now-numbered tab upward to discover the location of your fortunes. Fill in the tab triangles with a future fortune! This is where you can be creative and have a great time. I usually provide the standard “Yes,” “No,” and “Maybe” answers, but it’s also a nice opportunity to elicit a few unexpected grins and chuckles with some really wacky prophesies.
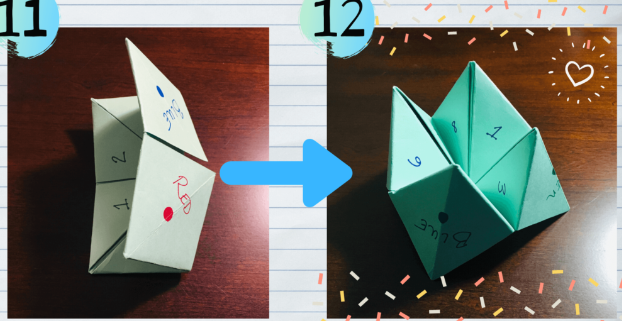
11. Cut your new square in half.
This step must be completed both horizontally and vertically. Folds are very important because they let your cootie catcher open and close smoothly.
12. Carefully remove the loose flaps from the folded inside to form four little compartments.
These compartments will house your fingers and allow your cootie catcher to stand on its own. Have you completed the last step? Congratulations! You’ve just created your own cootie catcher!
Conclusion
This origami craft may require several attempts before it is completed, so don’t be disheartened if it doesn’t look exactly like the photographs here at first. Continue to experiment, and you’ll soon have an awesome collection that is uniquely yours. Experiment with different sorts of paper with fascinating designs to discover what kind of elegant cootie catchers you can make!